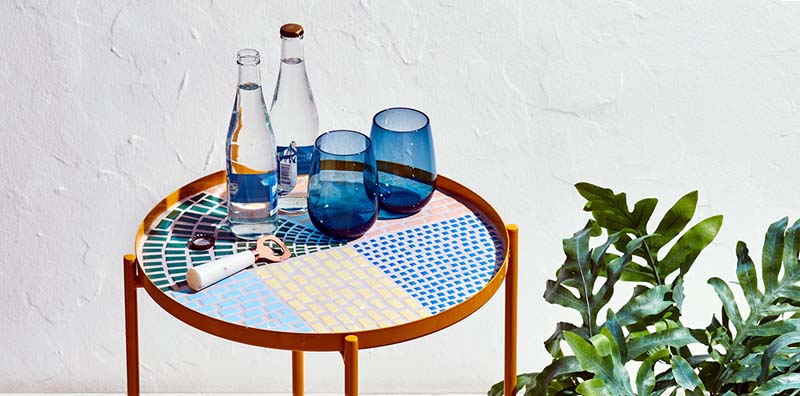
Creating a mosaic is like putting together a puzzle that you design.
 |
| © Blaine Moats |
By Lauren Hedrick and Kim Hutchison, Better Homes & Gardens
A mosaic is simply a pattern made up of small pieces of tile, glass, or other materials, usually secured with grout. It can be intimidating upon first glance, but making your own mosaic projects is actually fairly straightforward and the finished results are stunning. We'll walk you through the basics so you can decorate your own furniture or accessories with bright colors and patterns you create yourself. Tiles come in different materials, shapes, sizes, and colors (plus, grouting isn't nearly as complicated as it seems!) so it's easy to completely customize your look.
These tips and projects are for indoor use, but you can easily transform them into outdoor projects with a topcoat of weather-resistant sealer. Here’s the nitty-gritty on materials, tools, and tips to get started.
How to Make a Mosaic
Supplies Needed
- Mosaic tile
- Tile nippers
- Sandpaper
- Adhesive fiberglass mesh
- Adhesive
- Notched spreader
- Grout
- Disposable gloves
- Sponge
Step-by-Step Directions
Use these easy instructions to create a mosaic pattern on any surface you choose. Most mosaic projects can be completed in a few hours, and will need to dry for 24 hours before use.
Step 1: Prepare Tiles
The first step to laying down a mosaic is finding out how many tiles you need. Online estimators can help determine how many tiles you will need for a project, but it may also be helpful to plan your design on a piece of paper cut to the same size and shape as the surface you’ll be covering. When you're ready to begin tiling, you'll need a few tools: Tile Nippers ($16, Michaels) make cutting glass or ceramic tiles a breeze. Always wear safety glasses when using nippers, and sand sharp cut edges with Fine-Grit Sandpaper ($3, The Home Depot).Step 2: Lay Tiles
One of the easiest ways to lay out your design is to use Adhesive Fiberglass Mesh ($6, The Home Depot). It’s sticky enough to hold tiles in place but not so sticky that you can’t rearrange them. Plus, if you use this on the piece of paper you laid out earlier, the finished design transfers in one piece. When you arrange the tiles on the mesh, be sure to leave some space in between tiles for the grout you'll put down later.Step 3: Adhesive
After you've laid out the tiles, it's time to prep your surface. First, you'll want to rough up the surface with sandpaper and wipe clean with a dry cloth. To adhere the tiles to the chosen surface, you need an adhesive made to bond with the materials you’re using (wood, metal, glass, etc.). We used tubed construction adhesive for the metal tables and Weldbond ($8, The Home Depot) for the pots and frames. Check the label to make sure your choice will work with both the tiles and the surface. Apply an even layer of adhesive about half the thickness of a tile, using a Notched Spreader ($2, The Home Depot). Transfer the mesh with tiles on it to the prepared surface and gently press the tiles into adhesive. Let dry 24 hours, then trim the excess mesh.Step 4: Grout
Sanded grout is the best choice for mosaic projects because of its durability and ability to fill the large gaps mosaics often have. You can get Premixed Grout ($8, Michaels) that's ready to go, or look for Dry Powder Grout ($17, The Home Depot) that can be mixed with water. Both options come in a range of colors. Pre-mixed works well for small projects; the powder is more economical for large projects (about $6 to cover 27 sq. ft.). When you have the chosen grout prepared, wearing a disposable glove, use your hand to spread grout evenly over the surface so it really gets in between the tiles. Don't worry about getting grout on the surface of the tiles; when you're finished grouting, just wipe off the excess with a damp sponge and let the project dry for 24 hours.Project Inspiration
These projects are for indoor use only. For outdoor projects, you'll need a weather-resistant surface and a top coat of sealant.Table Tops
 |
| © Blaine Moats |
A metal or plastic table with a raised lip around the edges is one of the easiest surfaces to decorate with a mosaic pattern. We used the Gladom Tray Table, ($20, Ikea). Play the matching game: Even if your design is spontaneous like this one, make sure to use tiles of similar thickness so you'll end up with an even surface.
Pretty Planters
 |
| © Blaine Moats |
Applying tiles one by one directly onto a surface, like these concrete and ceramic planters, is another traditional method of creating mosaics. Look for inexpensive planters in the size and shape you like; it doesn't matter if you don't like the color or pattern, because you can easily cover the pots or planters with tiles and grout. If you want to use tiles that are too small to grasp with your fingers, use crafts tweezers to dip the backs into a small dish of adhesive.
Picture Frames
 |
| © Blaine Moats |
Mosaic a frame the same way you do a planter with individual tiles. We used wooden frames, but almost any material works as long as you rough up the surface with sandpaper. Be sure to protect the inside edges of the frame with painters tape and remove it before the grout dries for a smooth finish.
![[feature] 3 Easy Mosaic Projects to Make This Weekend](https://blogger.googleusercontent.com/img/b/R29vZ2xl/AVvXsEhQ5ib4TJ5_5JAnIVOpRrkZMiQFfkHfFQOtOisdi0nOW1a7SbKg8w83qCzPs4asth9zh0gTJC89y8lxXgXaJHxlg8uPpTtZcQHFglJgEODQDiYwvOO0gDp2t6tbjCHEUOHJ0AVq_cRRa0Fu/s16000/books.dearjulius.com.jpg) |
| © Blaine Moats |
See more at: Better Homes & Gardens


